How to Install DeepSeek Harness in Russia: A Step-by-Step Guide for Windows and macOS
Russian developers can install DeepSeek Harness through the Sozdai desktop application without manually installing Node.js or configuring an API provider. The process involves creating a Sozdai account, downloading the desktop application, connecting the account, and clicking “Install and Configure.” The application then installs DeepSeek Harness and connects it to the Sozdai API, with DeepSeek V4.1 Flash selected as the default model.
This guide explains the complete installation process, from account registration to sending your first request. It also covers manual API configuration and common troubleshooting steps. The instructions are based on Sozdai’s published documentation.
What Do You Need Before Installing DeepSeek Harness?
Before starting, prepare three things:
- A computer running Windows 10 or Windows 11 (64-bit), or macOS on Apple Silicon.
- A registered Sozdai account.
- An internet connection for downloading the application and completing the account connection.
You do not need an official DeepSeek account for this installation method. You also do not need to purchase an official DeepSeek subscription.
Instead, Sozdai provides API access to supported models through its own infrastructure. Users top up their Sozdai balance in rubles and use a personal Sozdai API key to pay for API requests. This is different from adding money to an official DeepSeek account.
The desktop application handles the main installation and connection steps, making it suitable for users who do not want to manage a development environment manually.
Step 1: Create a Sozdai Account
First, visit Sozdai.ai and create an account.
Complete the registration process using one of the authentication methods offered on the website. Once registered, sign in and open your account dashboard.
Your Sozdai account is where you manage API access and your balance. You will use the same account when connecting the desktop application.
You do not need to create a separate account with DeepSeek. The application connects to Sozdai’s API service rather than requiring users to authenticate through the official DeepSeek platform.
If you already have a Sozdai account, simply sign in instead of registering again.
Step 2: Download the Sozdai Desktop Application
After creating your account, open the Deepseek Harness in Russia page and locate the desktop application download section.
The published installation instructions support Windows 10 and Windows 11 in 64-bit versions, as well as macOS on Apple Silicon.
For Windows users, the documented installer is approximately 290 MB. Download the installer and open it to begin.
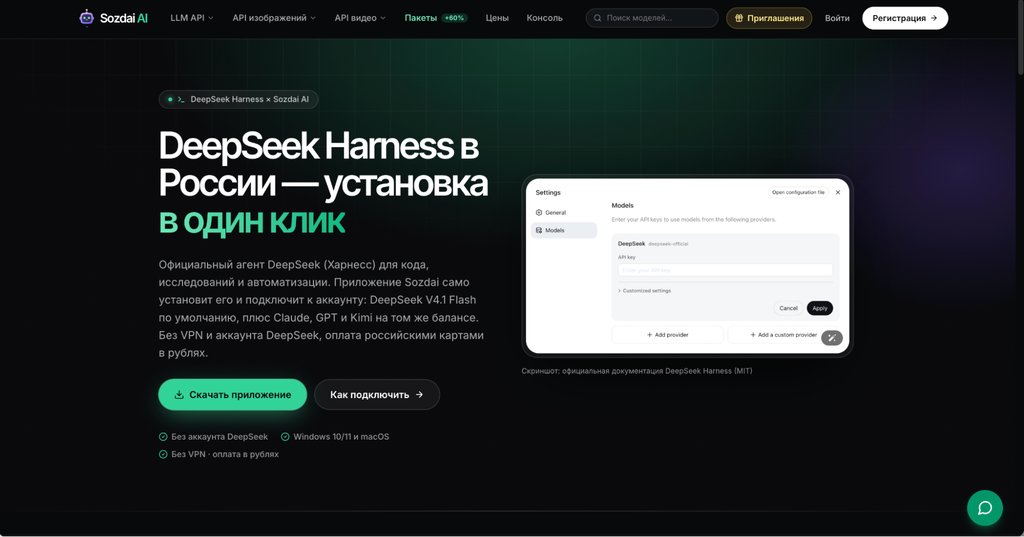
Make sure you download the application from the official Sozdai website rather than an unofficial software directory. This helps ensure that you are using the intended installer and can complete the account connection process.
After downloading, follow the installation prompts. The Windows installer is designed to install the application for the current user and does not require administrator privileges, according to the published instructions.
Step 3: Connect Your Sozdai Account
Once the desktop application has been installed, launch it.
At the top of the application window, find the “Connect Account” option. Click it to begin the authentication process.
Your default browser will open the Sozdai login page. Sign in with the account you created in Step 1.
After authentication, return to the desktop application. The account connection should now be complete.
This step links the local installation to your API account. The application can then configure the required connection without asking you to manually enter an API key during the automated setup.
If the browser opens but the desktop application does not appear to update, first check whether the login process has finished. Then return to the application and check the account connection status.
Step 4: Install and Configure DeepSeek Harness
After connecting your account, find the section labeled “DeepSeek Harness — Application.”
This is where you start the actual installation.
Click the “Install and Configure” button. The desktop application will download the official DeepSeek Harness installer, install it, and connect the application to your Sozdai account.
According to Sozdai’s published instructions, the Windows installer is approximately 290 MB. It installs for the current Windows user without requiring administrator privileges.
The application also configures the provider connection automatically. This means you do not need to open a terminal, install Node.js, or manually enter the API endpoint and authentication key when using this method.
Wait for the installation process to finish. Avoid closing the desktop application while the installer is still working.
When the process is complete, open DeepSeek Harness. You should be able to access its interface and begin using the available models.
Step 5: Check the Default Model
The automated setup selects DeepSeek V4.1 Flash as the default model.
This means beginners do not need to choose a model or configure a provider before making their first request.
You can also select other supported models from the model list. Sozdai’s published model information includes DeepSeek V4 Pro, Claude, GPT, Kimi, and Qwen models.
For reference, the two DeepSeek model IDs listed for this setup include:
| Model | Model ID | Typical use |
| DeepSeek V4.1 Flash | deepseek-v4.1-flash | Everyday coding assistance and general tasks |
| DeepSeek V4 Pro | deepseek-v4-pro | More demanding tasks and complex reasoning |
DeepSeek V4.1 Flash is a sensible starting point for most users. You can switch to another supported model when a particular task requires different capabilities.
The model ID is especially useful if you later decide to configure the provider manually or connect another compatible application.
Step 6: Send Your First Request
After checking the model selection, start a new Harness session.
For the first test, use a simple task rather than asking the agent to modify an entire project. For example, open a small project and ask Harness to explain its directory structure or describe what a particular source file does.
A successful response is a basic indication that the application can communicate with the selected model.
You can then try more practical development tasks, including:
- Explaining unfamiliar code.
- Identifying possible causes of a programming error.
- Reviewing a function or module.
- Suggesting improvements to an existing project.
- Planning the implementation of a new feature.
If you are using Harness with an existing codebase, make sure the application has access to the relevant project directory. Review proposed file changes before accepting them, particularly when working with important or production code.
Starting with small tasks also makes it easier to identify connection problems before using the agent for more complicated work.
Optional: Configure the API Manually
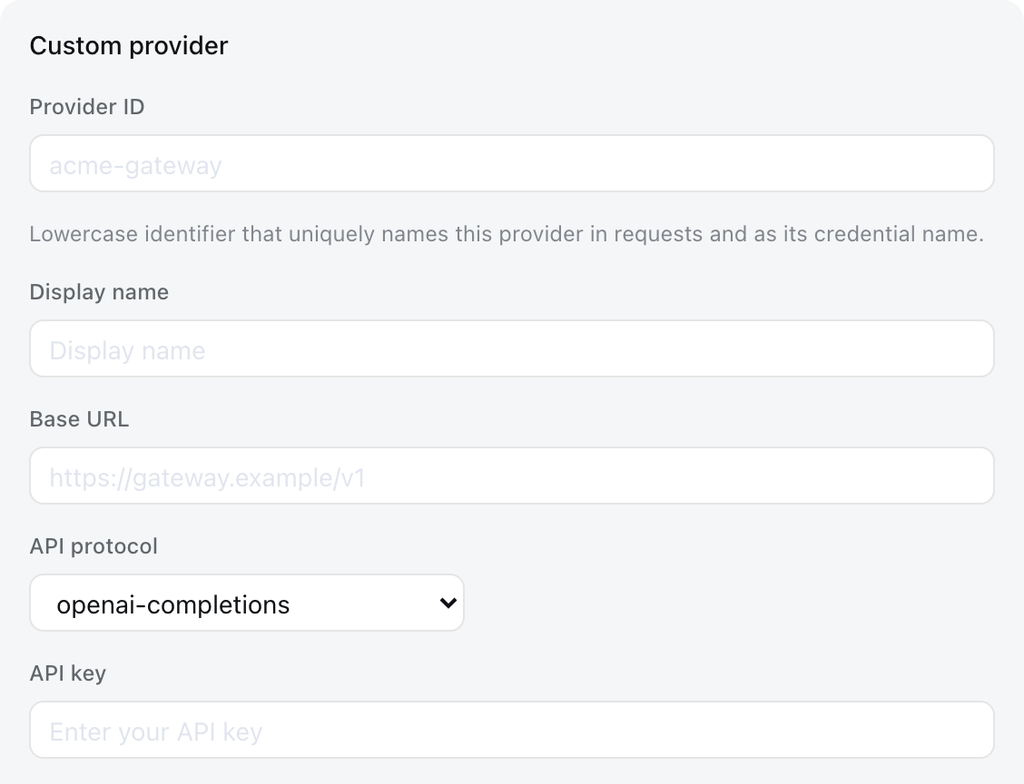
The desktop application is the easiest installation method, but developers who prefer manual configuration can connect Sozdai as a custom provider.
Open DeepSeek Harness and navigate to:
Settings → Models → Add a custom provider
The provider settings should use the following values:
| Setting | Value |
| Base URL | https://api.sozdai.ai/v1 |
| Protocol | openai-completions |
| API key | Your personal Sozdai API key |
| Model ID | deepseek-v4.1-flash |
The API key is generated through your Sozdai account. It begins with the prefix sk-corr-.
After entering the provider details, use “Fetch available models” to retrieve the models available through the API.
If the model list does not appear, check the Base URL and API key before trying again. The Base URL should end in /v1, and the key should be copied from your Sozdai account rather than entered from memory.
You can also enter a supported model ID manually if model discovery does not return the expected list.
This manual method is useful for experienced users who want more control over provider settings. However, it is not necessary if you have already completed the automated installation through the Sozdai desktop application.
Common Installation Problems and How to Fix Them
Even with an automated setup process, users may occasionally encounter installation or connection problems. Here are several checks worth making.
The Account Connection Does Not Complete
If clicking “Connect Account” opens a browser but does not connect the desktop application, confirm that you have completed the Sozdai login process.
Return to the desktop application after signing in. If the connection still does not appear, close and reopen the application and try again.
The Installer Does Not Finish
The installation process needs to download the Harness installer and complete the local setup.
Check your internet connection and available disk space. On Windows, confirm that your computer is running a supported 64-bit version of Windows 10 or Windows 11.
If the installer repeatedly fails, use the official download page to obtain the installer again rather than relying on unofficial copies.
Harness Opens but Does Not Generate a Response
An application can install successfully while API requests still fail.
Start by checking that your Sozdai account is connected and has sufficient balance. Then confirm that the selected model is available.
If you used manual configuration, check the Base URL, API key, and model ID. A missing or incorrect provider setting can prevent Harness from sending requests successfully.
Fetch Available Models Returns an Empty List
This issue is most relevant to manual provider configuration.
Check that the Base URL is exactly https://api.sozdai.ai/v1 and that the API key begins with sk-corr-.
If the list is still empty, try entering the documented model ID manually, such as deepseek-v4.1-flash.
Do You Need Node.js?
Not for the automated desktop installation described in this guide.
Sozdai’s desktop application handles the installation and provider configuration. Node.js is relevant to alternative manual installation workflows, not the one-click setup.
How API Usage Is Paid For
After installing Harness, users should understand how API access is billed.
Sozdai does not sell an official DeepSeek subscription and does not add funds to a user’s existing DeepSeek account. Instead, users top up their Sozdai balance in rubles and use a personal Sozdai API key to pay for requests.
Billing is based on actual API usage rather than a fixed monthly subscription. The amount deducted depends on the selected model and the tokens consumed by requests.
According to Sozdai’s payment guide published on November 5, 2026, the minimum balance top-up starts at 425 RUB. The guide lists Russian bank cards, SBP, SberPay, T-Bank, and YooMoney among the available payment methods.
This arrangement allows users in Russia to access supported models through Sozdai’s API infrastructure without needing to pay for an official DeepSeek subscription.
Before starting a large project, check the current model pricing page. API prices and model availability can change, so the latest published rates should be used when estimating costs.
Which Model Should Beginners Choose?
For most first-time users, DeepSeek V4.1 Flash is a reasonable default.
It is positioned as a faster, more economical option for everyday development assistance, general questions, and routine coding tasks.
DeepSeek V4 Pro is another option for more demanding tasks and complex reasoning.
Sozdai’s published pricing lists the following rates:
| Model | Input price per 1 million tokens | Output price per 1 million tokens |
| DeepSeek V4.1 Flash | 35.7 RUB | 142.8 RUB |
| DeepSeek V4 Pro | 110.93 RUB | 332.78 RUB |
These are published rates and may change. Check the current pricing page before estimating the cost of extended use.
You do not need to make this decision during installation. Start with the default model, test Harness with a few ordinary tasks, and switch models later if your workload requires it.
Final Installation Checklist
Before using DeepSeek Harness for regular development work, confirm the following:
- The Sozdai desktop application is installed.
- Your Sozdai account is connected.
- DeepSeek Harness has finished installing.
- DeepSeek V4.1 Flash appears as the default model.
- A simple test request receives a response.
- Your Sozdai balance is sufficient for API usage.
The automated installation method removes much of the manual configuration involved in setting up an AI coding agent. For users in Russia, it also provides a way to connect to supported DeepSeek models through a separately managed API account and balance.
Once the application is installed and the first request works, you can start using Harness for code analysis, debugging, project exploration, and other development tasks.