Set up Your Jobma Integration with Workday
Jobma integrates with Workday – a leading provider of enterprise cloud applications for human resources, finance, and more. This guide aims to assist you in establishing the integration between Jobma and Workday, providing step-by-step instructions for setup and usage.
Before setting up the integration with Workday, it’s important to ensure that the necessary permissions are enabled in your Workday account. Follow the steps below to authorize these permissions.
To integrate Workday in your Jobma recruiter account, watch this quick video tutorial or follow the step-by-step guide below:
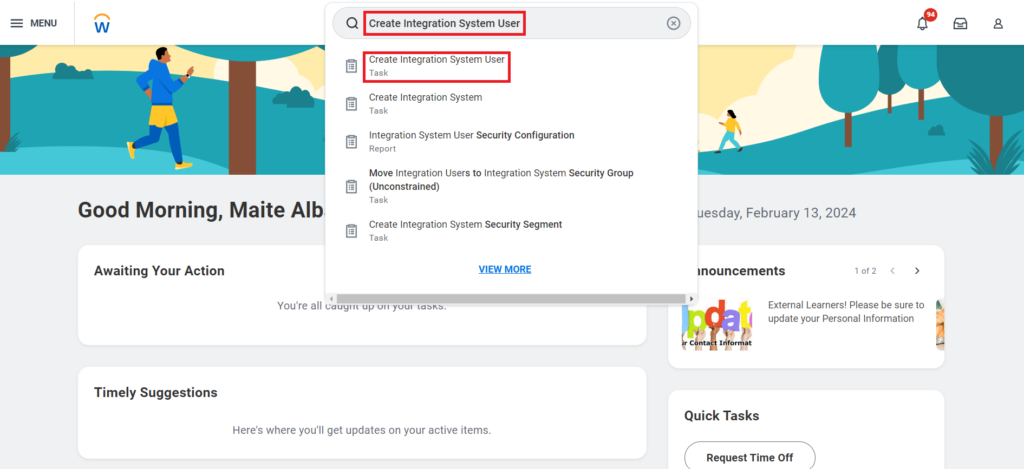
Step 1: Create an Integration System User (ISU)
- In your Workday portal, search Create Integration System User using the search bar on the top and select Create Integration System User (Task).
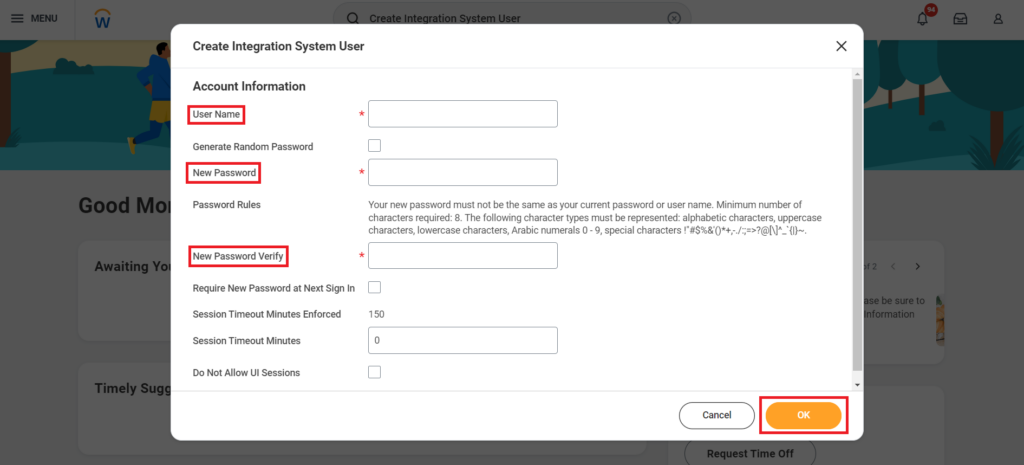
- Create your Username and Password. Uncheck the Require New Password at Next Sign option to avoid having to enter your username and password again.
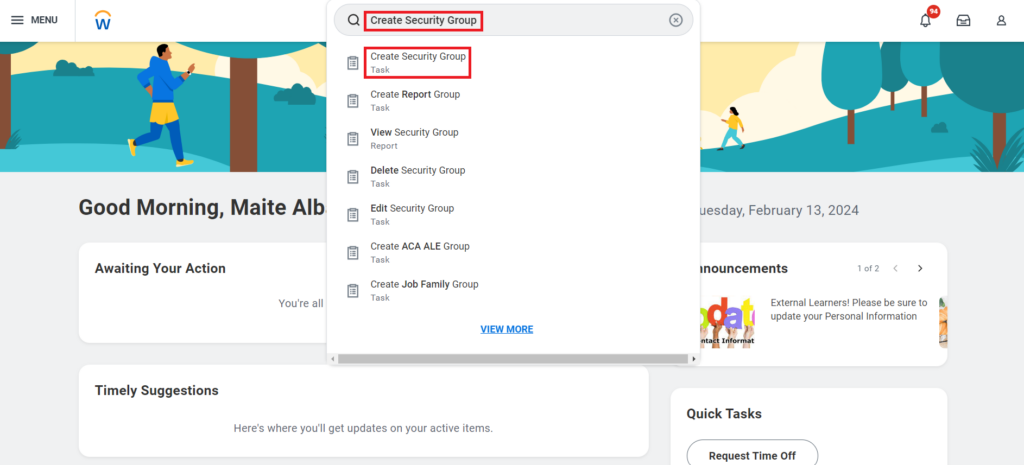
Step 2: Create a Security Group and Assign an Integration System User
- Search Create Security Group and select Create Security Group (Task).
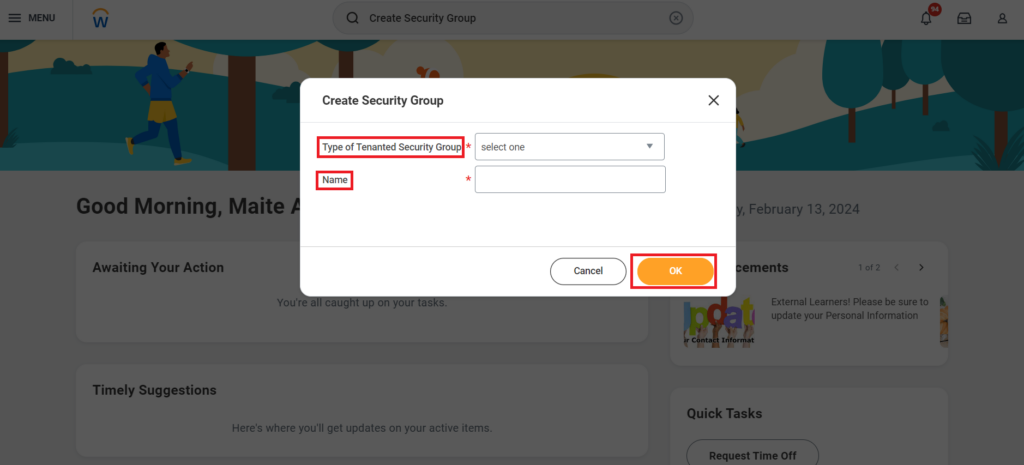
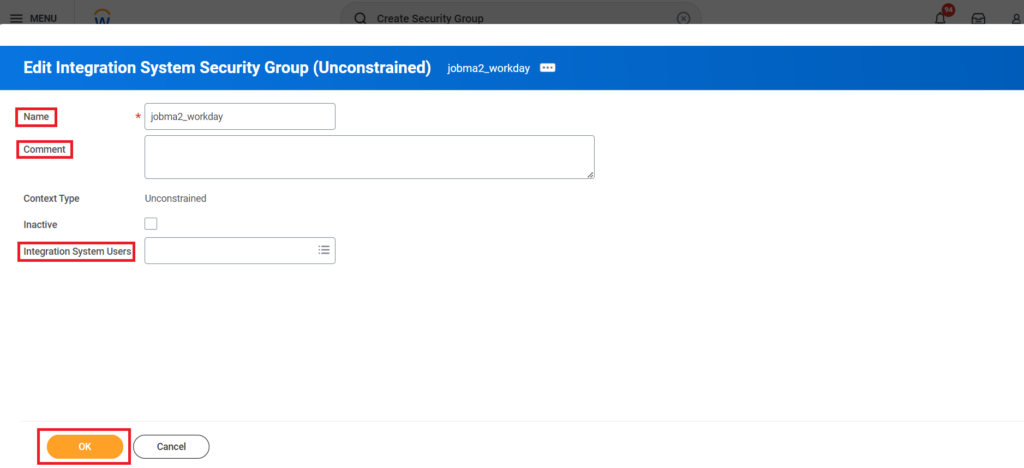
- Choose Integration System Security Group (Unconstrained) for the Type of Tenanted Security Group field. In the Name field, enter the ISU username that you created in Step 1 above.
- Click OK, and on the next page, enter the ISU name in the Name field. Add a comment if needed and enter the ISU name again in the Integration System Users field.
Step 3: Configure Domain Security Policy Permissions
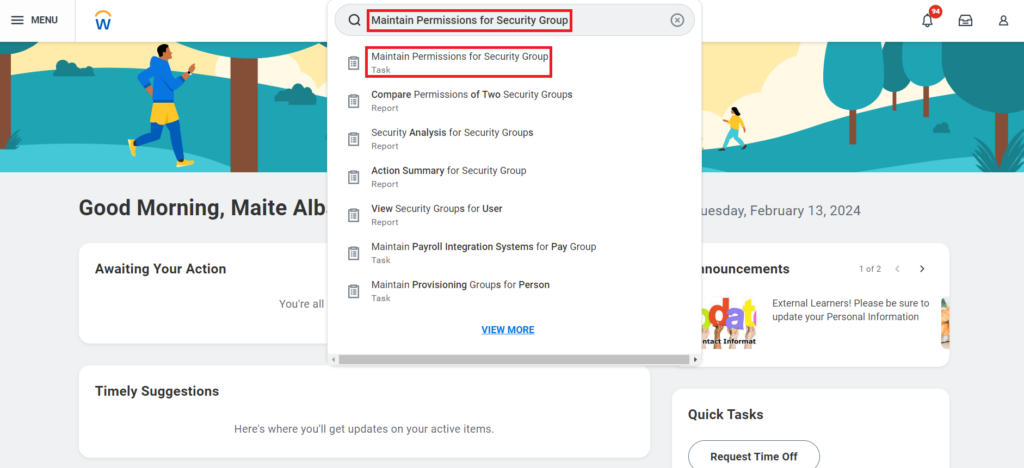
- Search Maintain Permissions for Security Group and select Maintain Permissions for Security Group (Task).
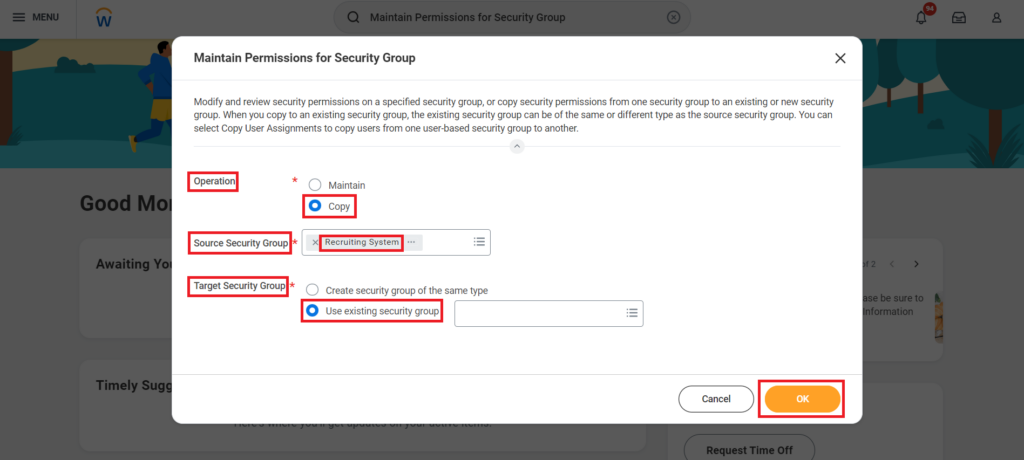
- Choose Copy as the Operation, Recruiting systems in the Source Security Group and Use existing security group for Target Security Group and enter the ISU name.
- Click OK. The domain security policy will be added automatically.
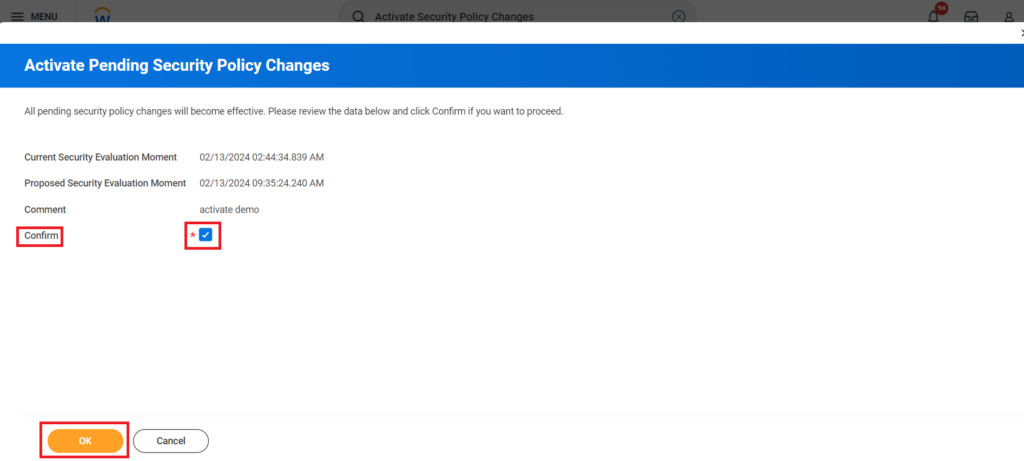
Step 4: Activate Security Policy Changes
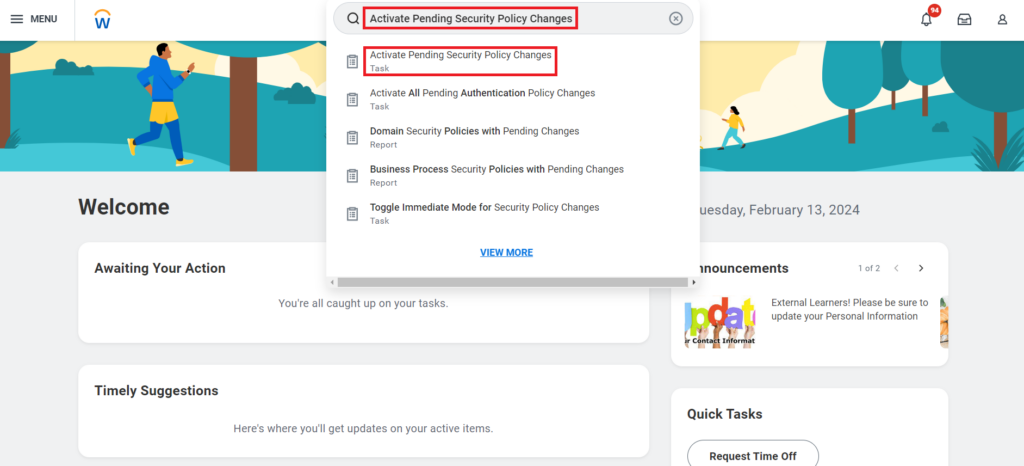
- Search Activate Pending Security Policy Changes and select Activate Pending Security Policy Changes (Task).
- On the next page, add a comment if needed. Check the Confirm option to confirm the changes, and click OK.
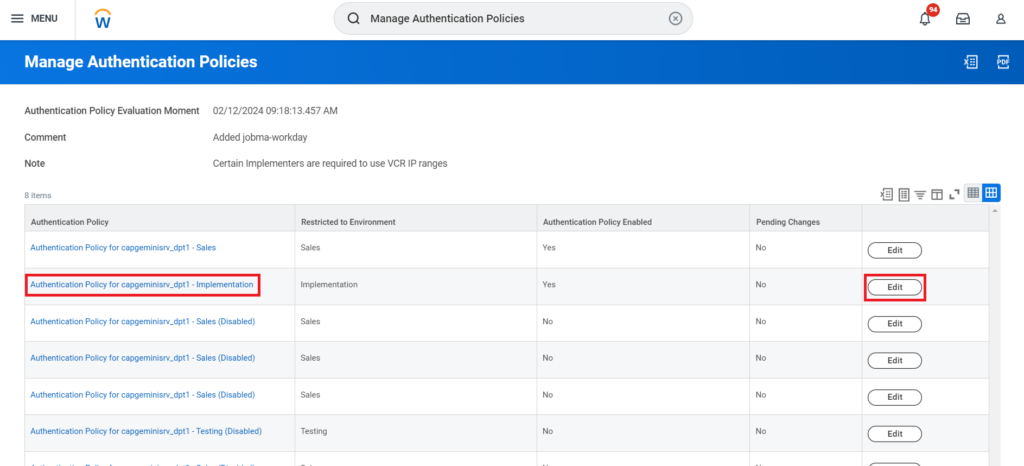
Step 5: Validate Authentication Policy
- Search Manage Authentication Policies and select Manage Authentication Policies (Report).
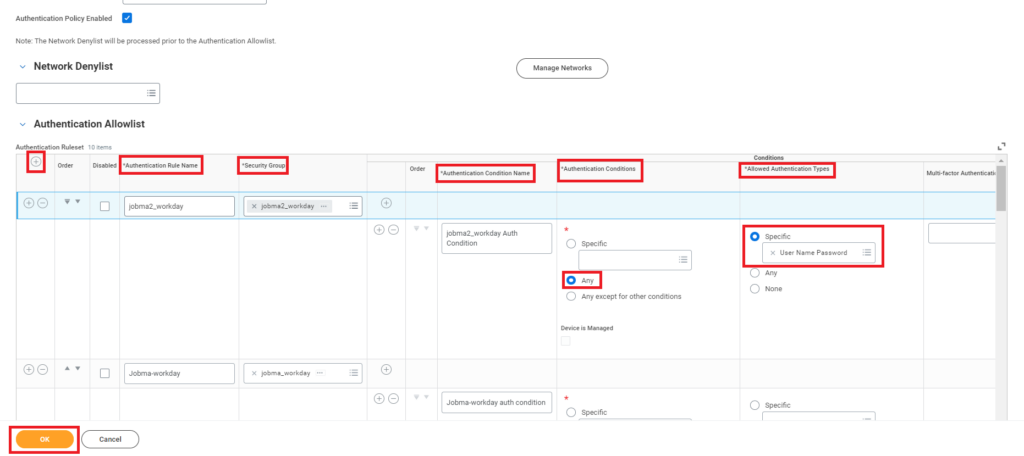
- Click Edit on the Authentication Policy for capgeminisrv_dpt1 – Implementation Authentication Policy and add a new Authentication Ruleset.
- Enter ISU under Authentication Rule Name and Security Group. Enter ISU Auth condition under Authentication Condition Name. Choose Any for Authentication Conditions. Make sure the Allowed Authentication Types is set to Specific and select User Name Password.

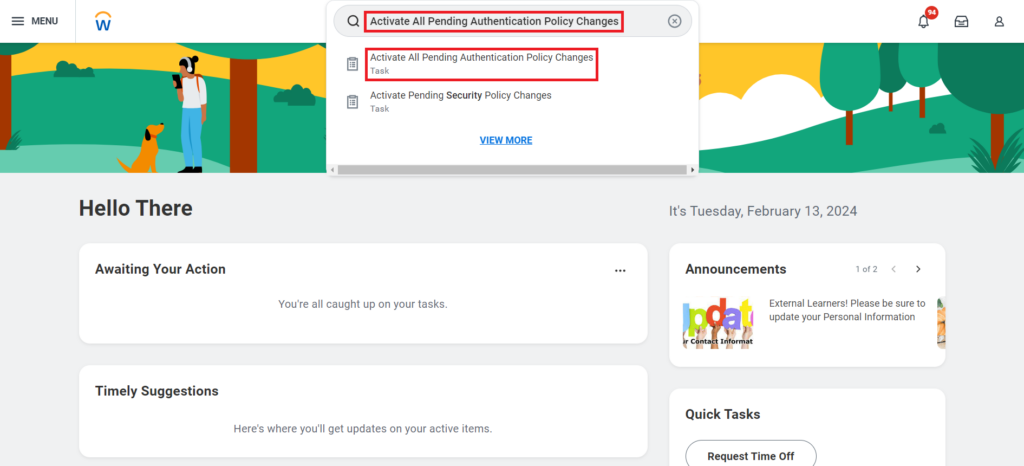
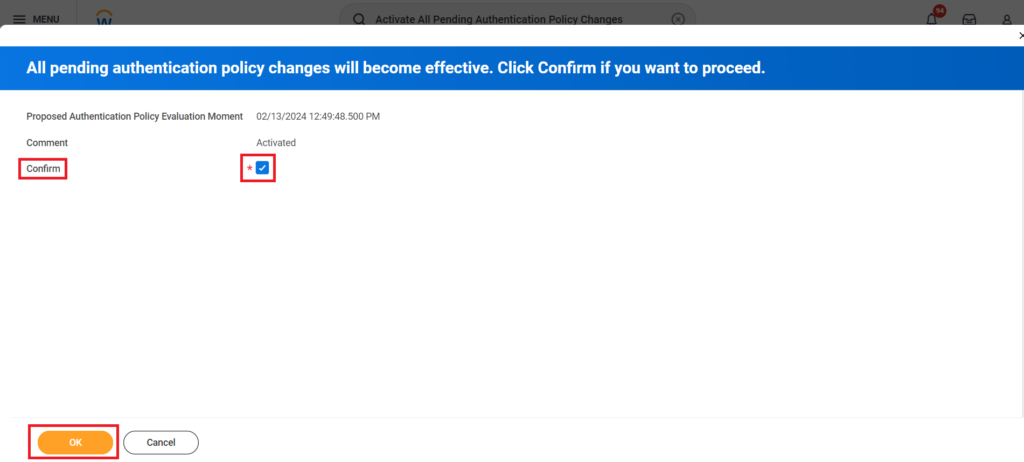
Step 6: Activate All Pending Authentication Policy Changes
- Search Activate All Pending Authentication Policy Changes and select Activate All Pending Authentication Policy Changes (Task).
- On the next page, add a comment if needed. Check the Confirm option to confirm the changes and click OK.
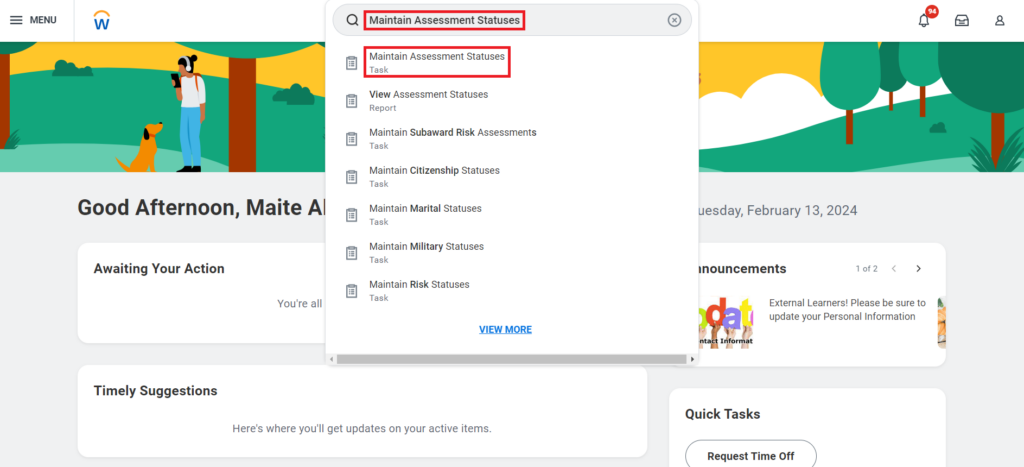
Step 7: Setup Assessment Statuses in Workday
- Search Maintain Assessment Statuses and select Maintain Assessment Statuses (Task).
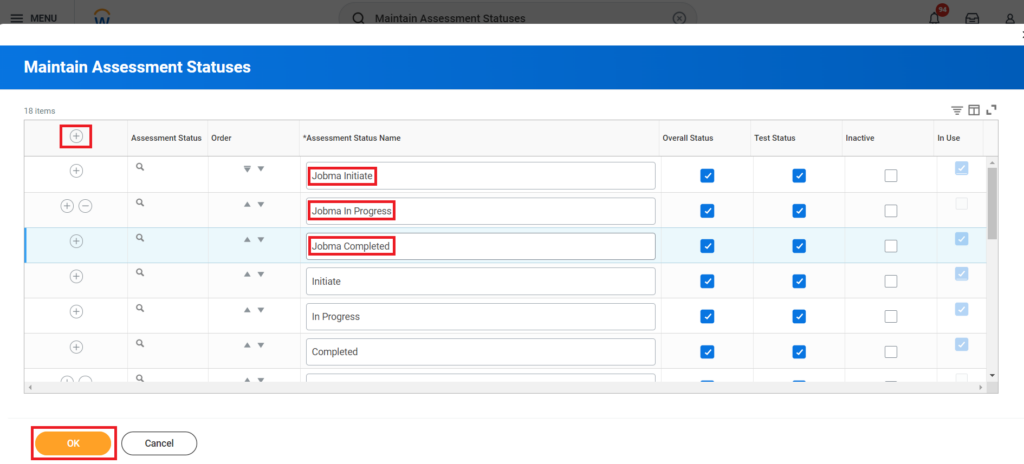
- Click the + button to add three new statuses and name them: Jobma Initiate, Jobma In Progress, and Jobma Completed.
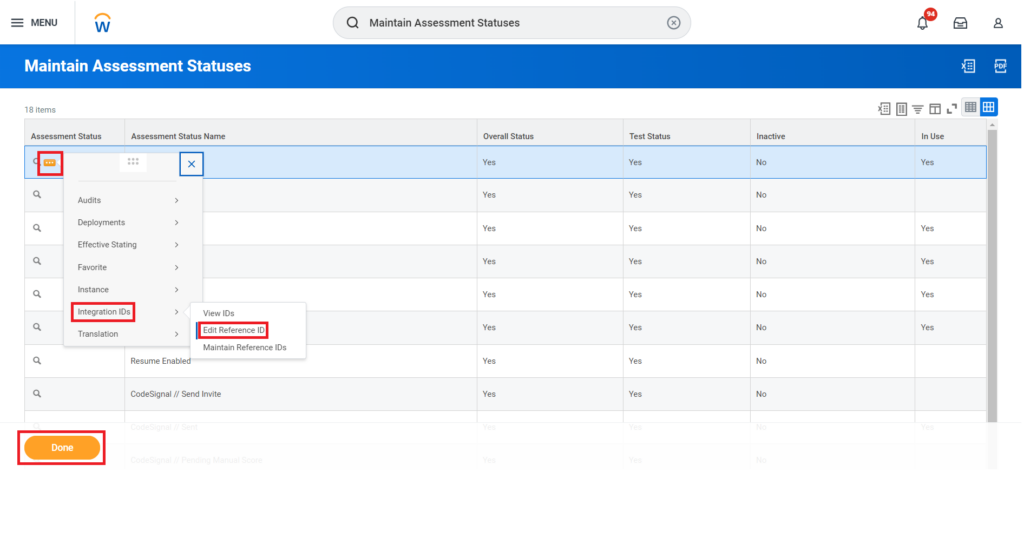
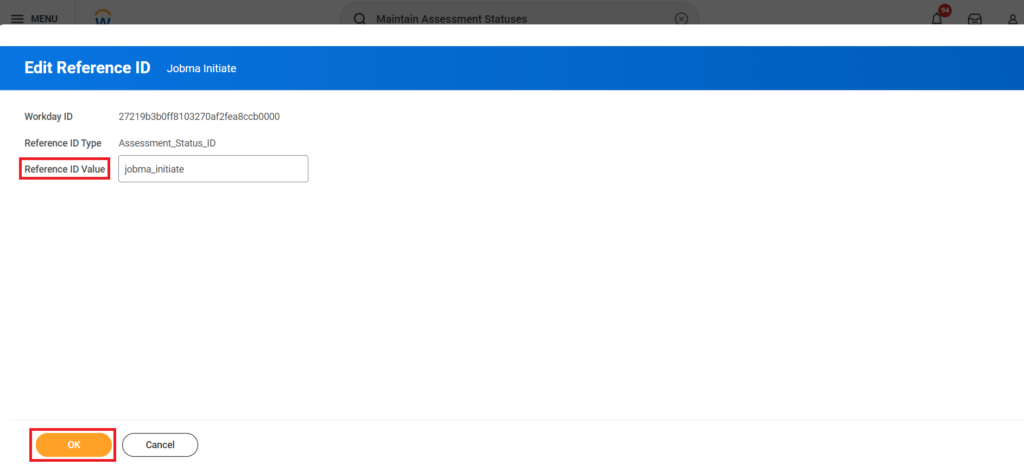
- It’s time to change the Reference ID of all three statuses. Navigate to the three dots button > Integration IDs > Edit Reference ID.
- Change Jobma Initiate to jobma_initiate, Jobma In Progress to jobma_in_progress and Jobma Completed to jobma_completed. (Reference ID must be in small case).
Step 8: Obtain Web Services Endpoint
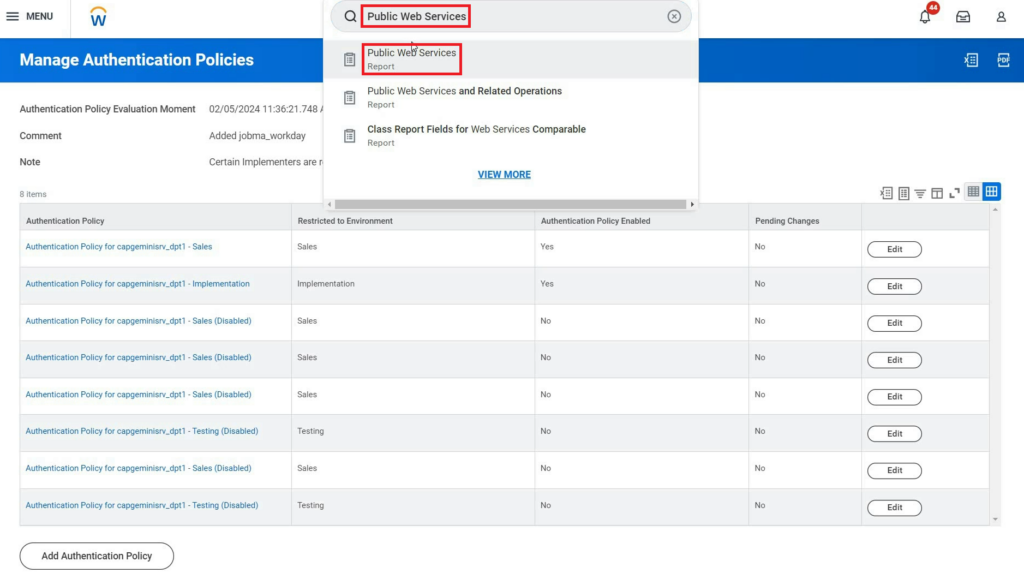
- Search Public Web Services and select Public Web Services (Report).
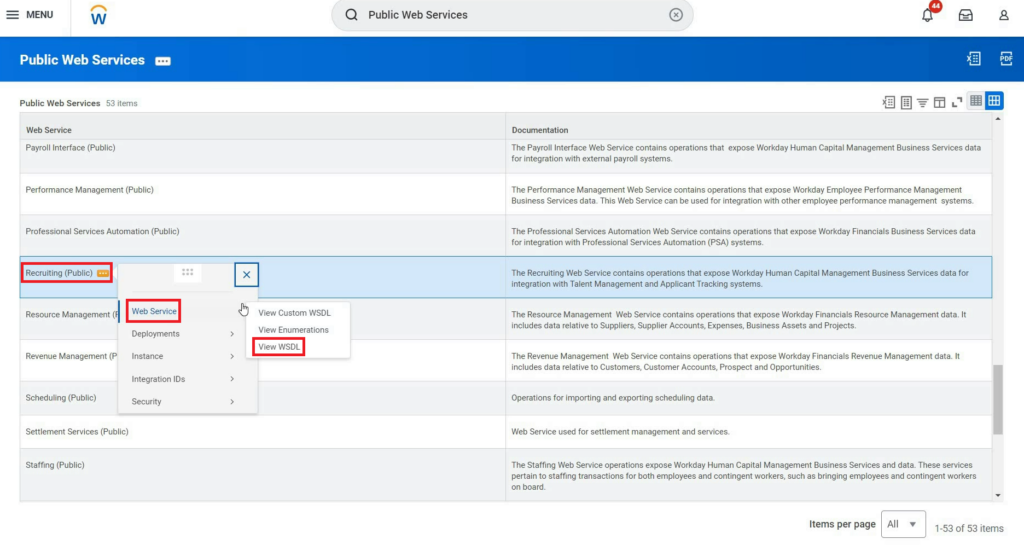
- Scroll down to Recruiting (Public), hover over three dots, and select Web Services > View WSDL.
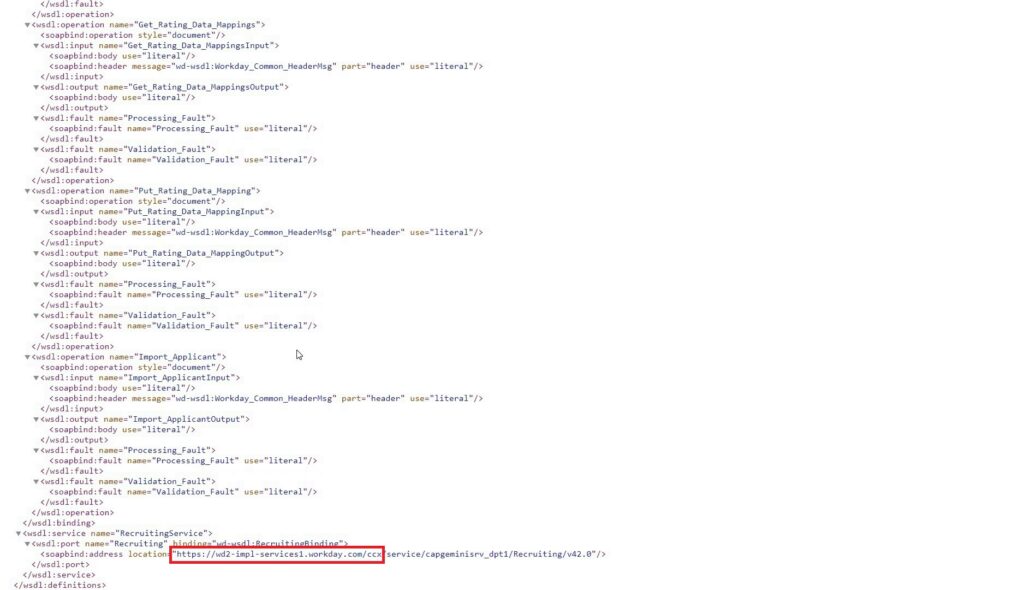
- On the next page, navigate to the bottom and copy the URL highlighted in the screenshot (e.g. https://wd5-services1.myworkday.com/ccx). The URL could be different for you.
Once these steps are completed, you’re ready to connect Workday and Jobma.
Step 9: Connect with Jobma
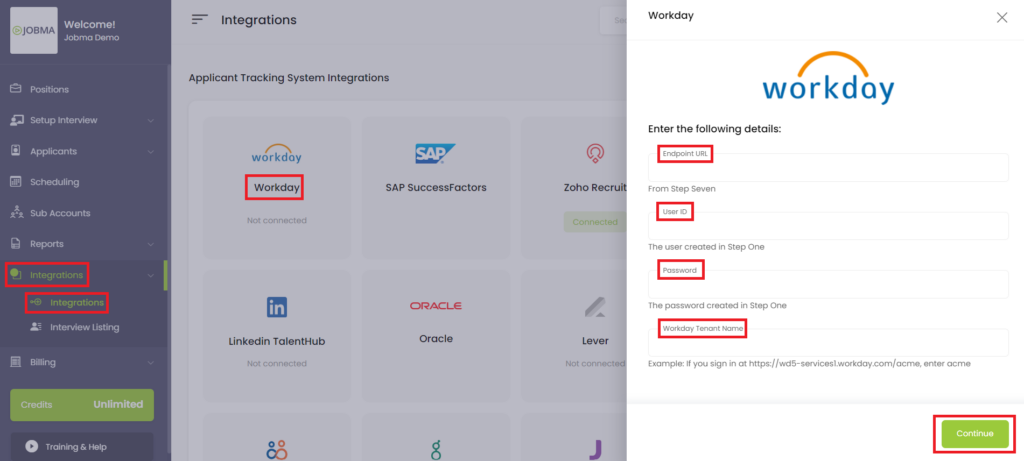
On your Jobma account, go to the Integrations on the left navigation menu. Click Integrations, then select Workday from the list.
Enter your ENDPOINT URL from Step 7, USER ID from Step 1, PASSWORD from Step 1, and WORKDAY TENANT NAME (it can be found on the workday portal URL bar on the top). For example, if your URL looks like https://impl.workday.com/capgeminisrv_dpt1/d/task/ enter capgeminisrv_dpt1 and click Continue.
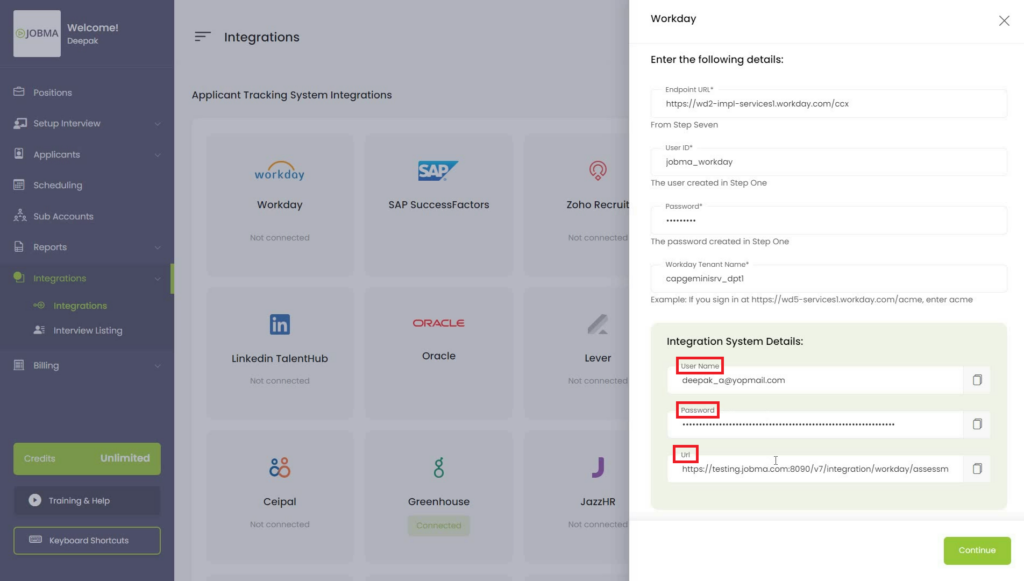
This generates Integration System Details (Username, Password, and URL), which will later be entered into the Workday portal to establish the integration.
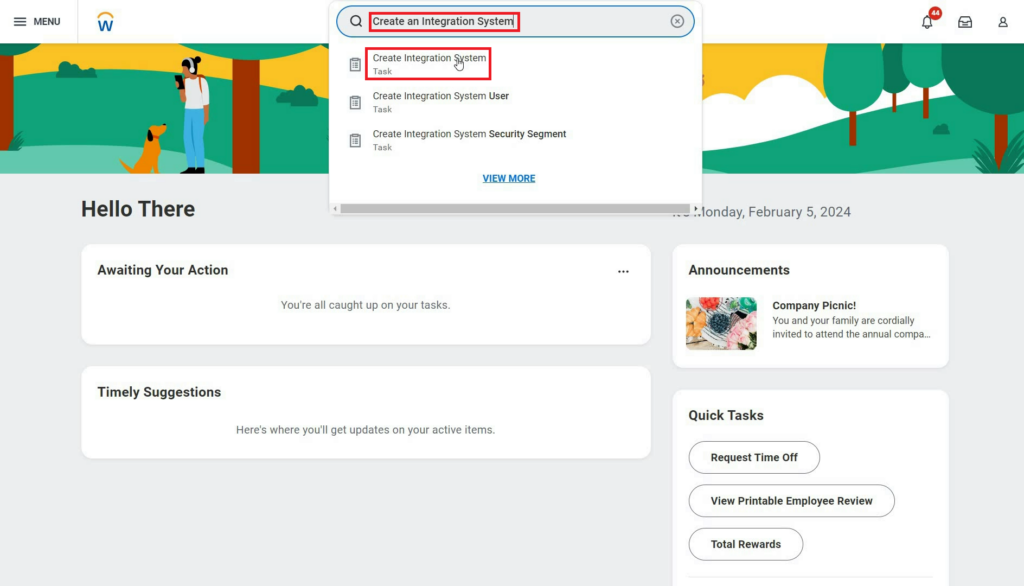
Step 10: Create Integration System
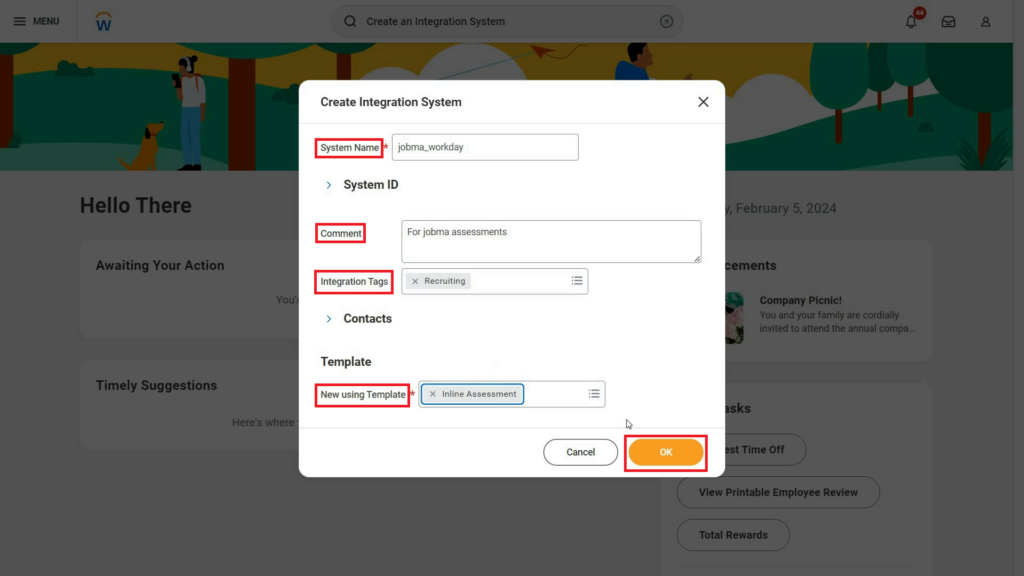
On your Workday account search Create an Integration System and select Create Integration System (Task). On the next screen enter the System Name, select Recruiting in the Integration Tags field, and Inline Assessment in New using Template. Add a comment if needed.
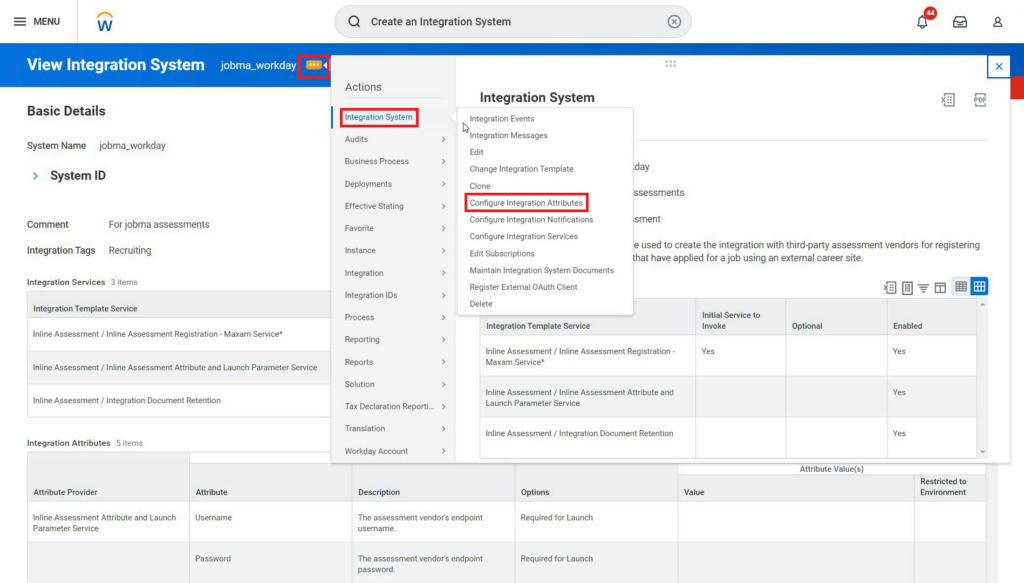
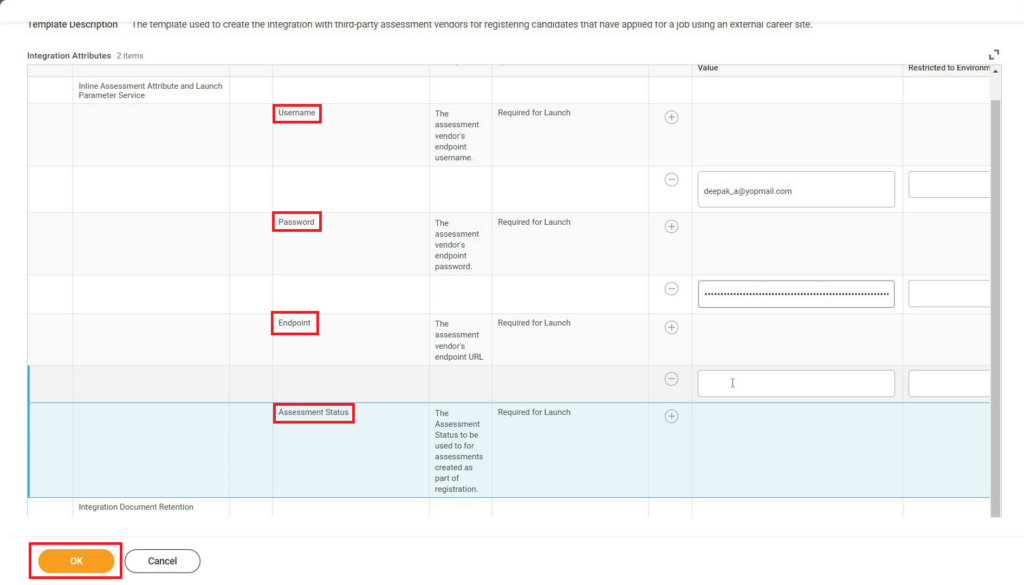
On the next page, navigate to the three dots button > Integration System > Configure Integration Attributes. Enter the Username, Password, and the Endpoint generated from Jobma.
Select Jobma Initiate under Assessment Status and a suitable number of days on Document Retention Policy on the same page and click OK.
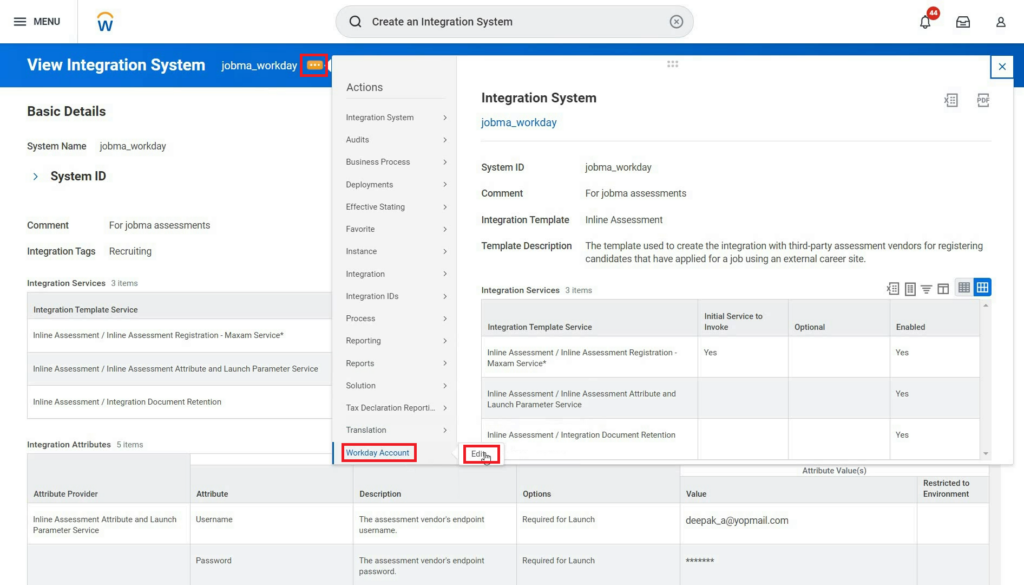
Navigate to the three dots button again then Workday Account > Edit. Enter the ISU name and click OK.

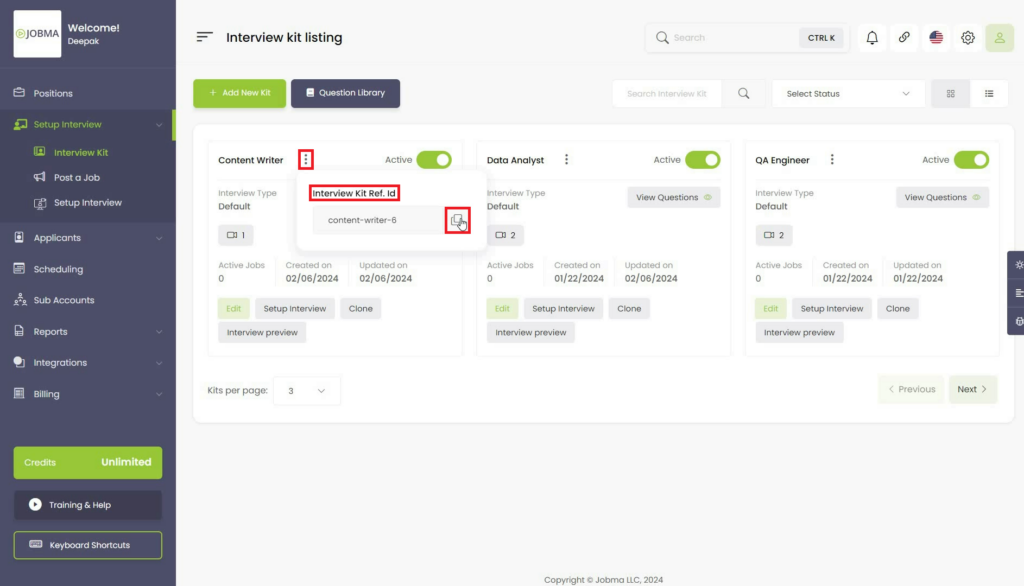
Step 11: Create an Interview Kit on Jobma
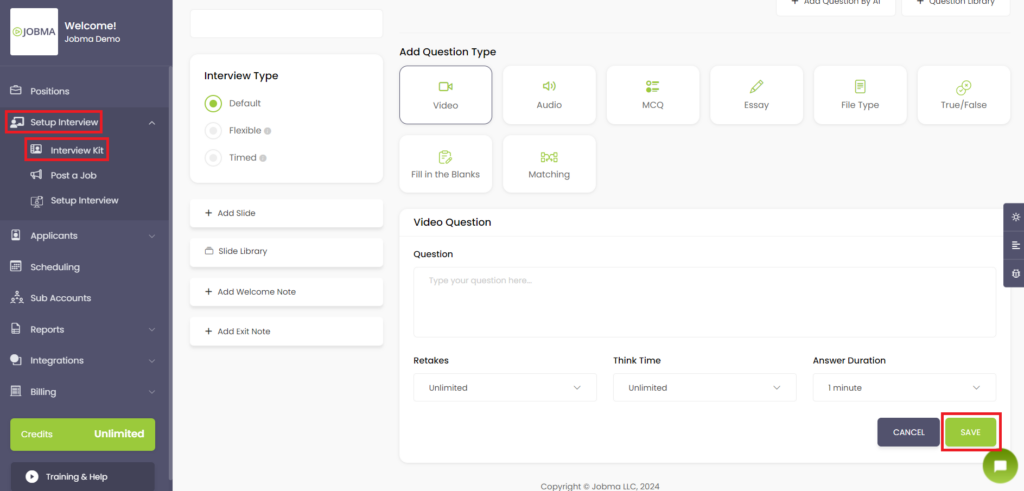
It’s time to create an interview kit on Jobma. Navigate to Set up an Interview > Interview Kit, add your desired questions, and click Save.
Go to the three dots button and copy the Interview Kit Reference ID by clicking on the copy icon.
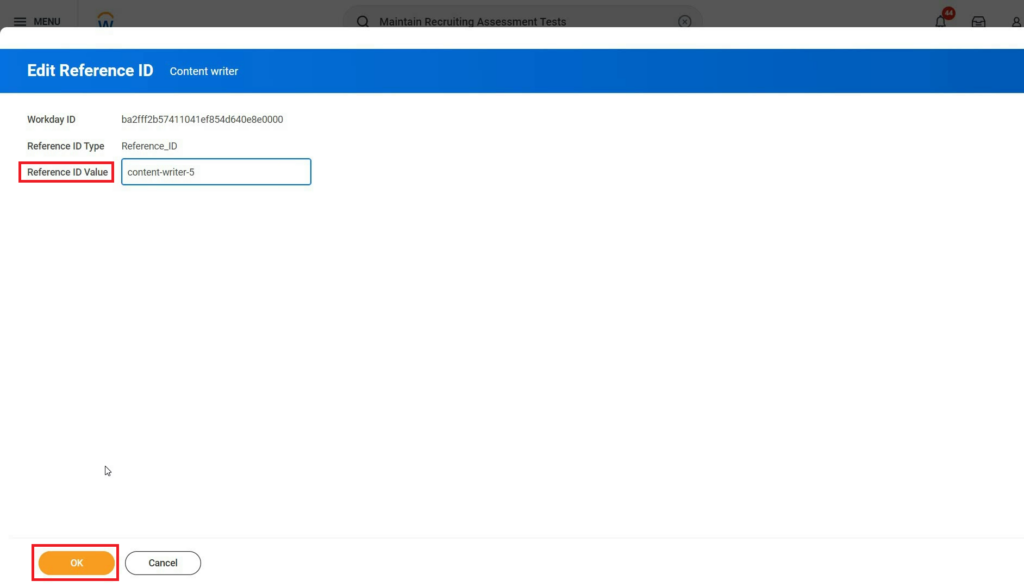
Step 12: Reference Interview Kit from Jobma
On your Workday portal, search Maintain Recruiting Assessment Tests, hover over three dots, and select Integration IDs > Edit Reference ID. Replace the Reference ID Value with the value you copied earlier and click OK.

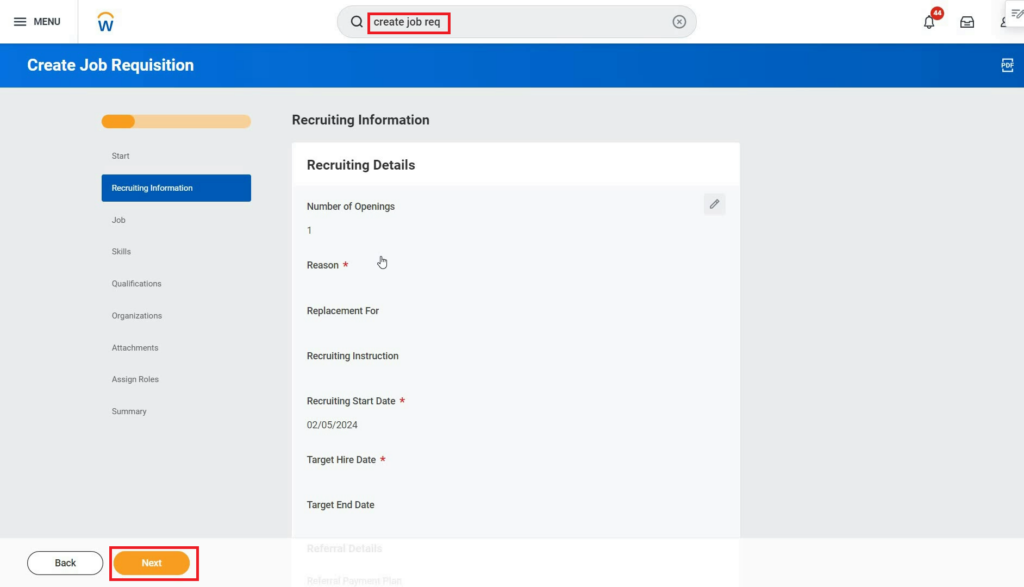
Step 13: Invite Candidates for Jobma Interview
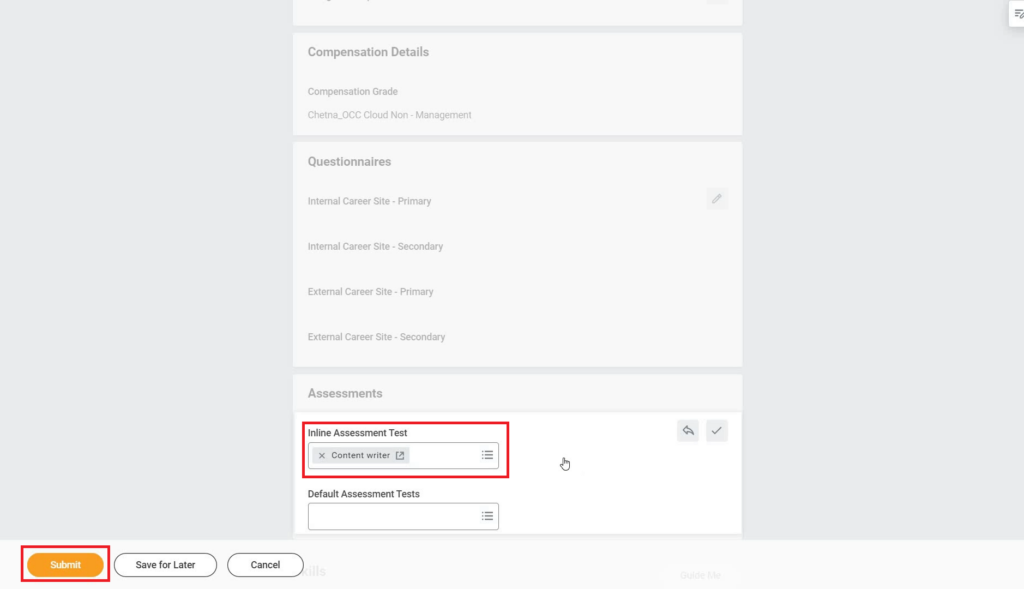
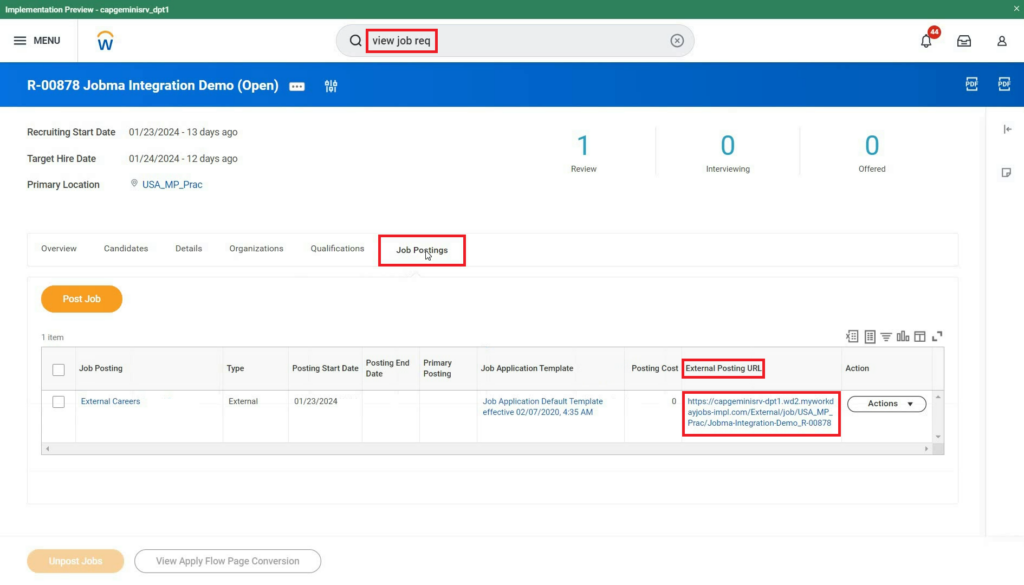
It’s time to invite candidates for Jobma interviews. In Workday, search Create Job Requisition and select Create Job Requisition (Task). You can either create a new job requisition or use an existing job requisition. When adding a new one, enter the required details, and under Inline Assessment Test, select the interview kit that you would like to use.
Open the Job requisition and go to Job Postings. You can copy the External Posting URL here and share it with the candidates you want to invite for the interview.
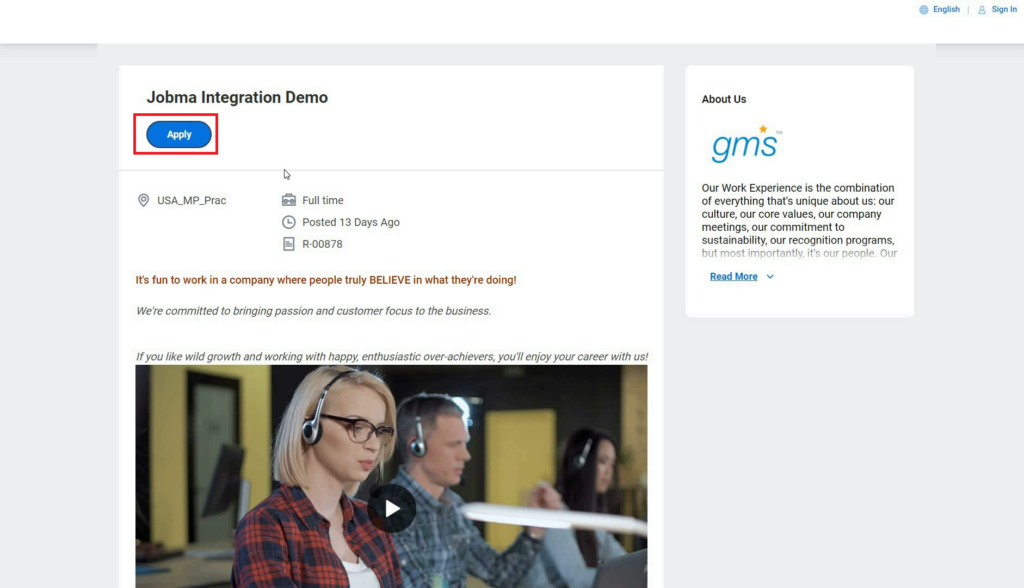
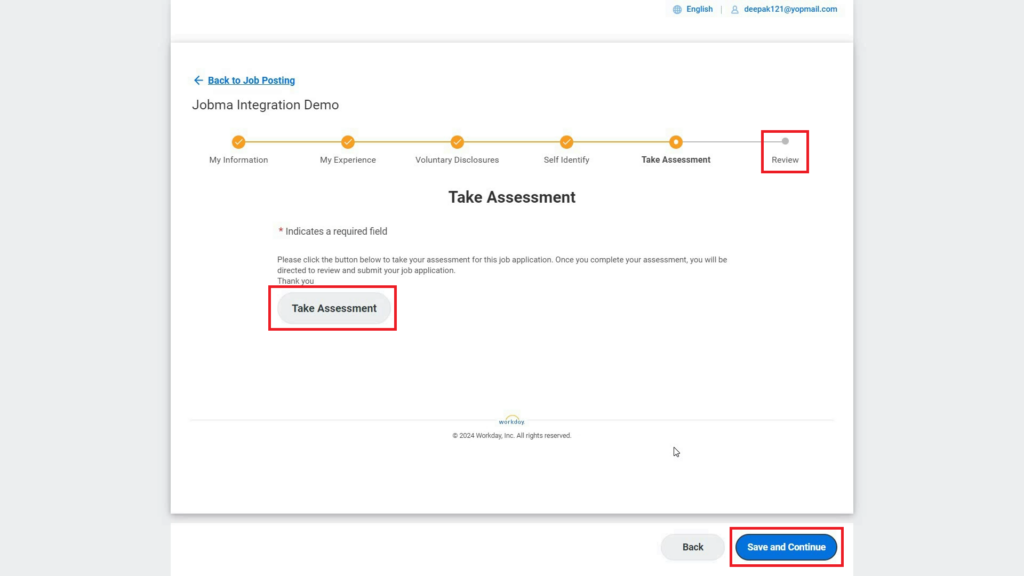
When candidates access the interview link, they’ll need to click on the Apply button and enter their information. Once the details are entered, they will see a Take Assessment button taking them to the interview page. After the interview is finished, the candidate will need to go back to the previous page for review and submit the application.
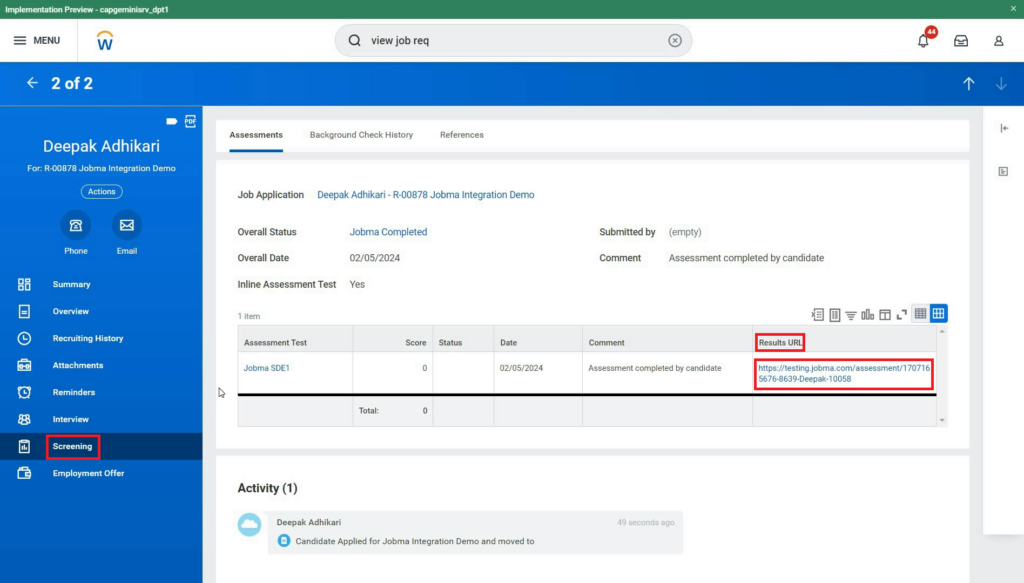
Step 14: Evaluate Candidates
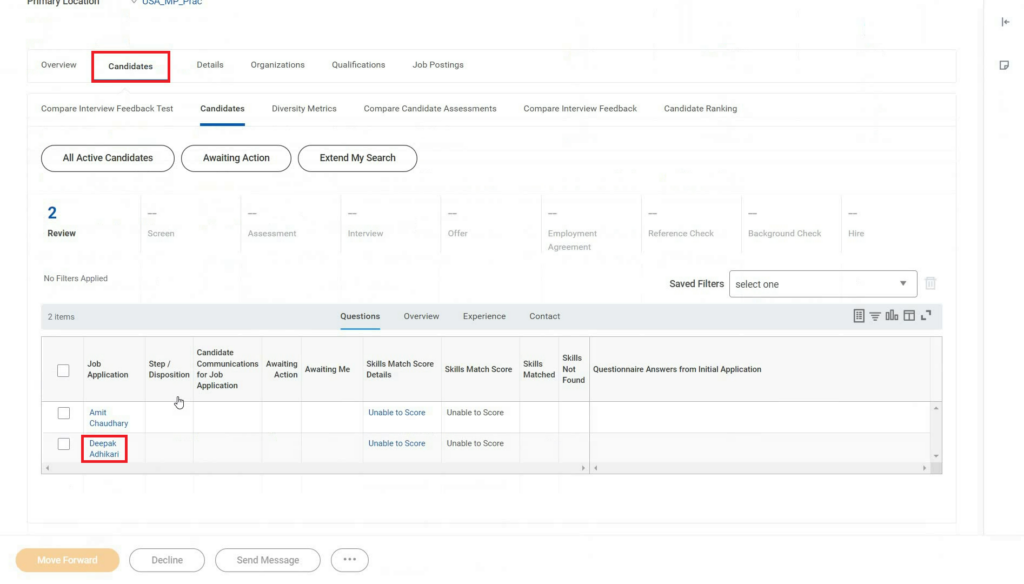
To evaluate the candidate go back to Workday, Open the relevant Job Requisition. Go to the Candidates tab and select the candidate. Go to Screening on the left navigation panel, and click on the URL under the Results URL column.
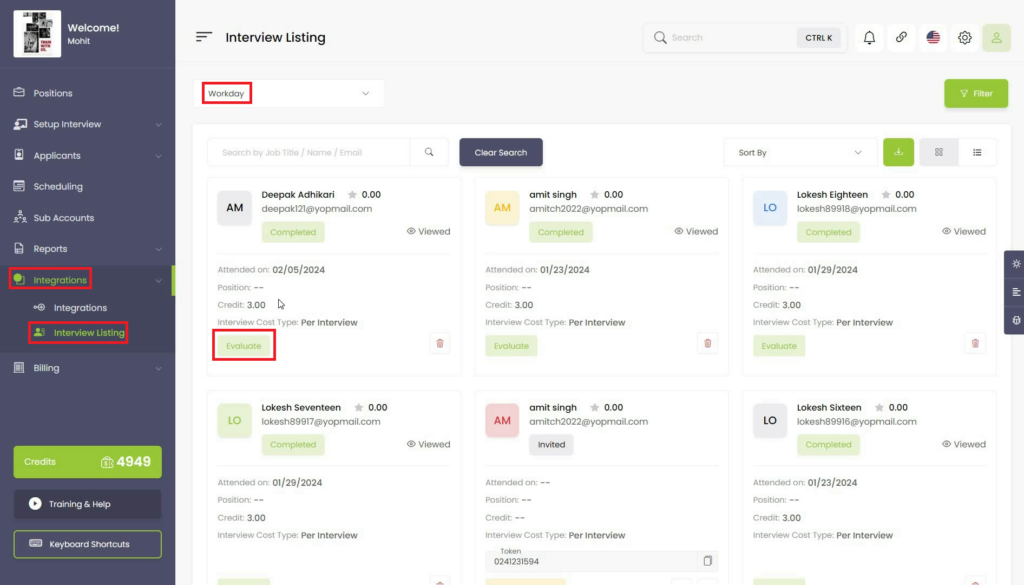
Alternatively, you can view the interview by going to Integrations in Jobma. Select the interview listing and click on Workday.
You’re all set! If you have any questions or need help setting up the Workday integration, please contact your Jobma support representative.
Additional Reading: Jobma Integrates with TRAFFIT